A mold inspection follows a systematic 5-step process that identifies visible and hidden mold growth in your property. At Protect The Investment, we conduct comprehensive assessments that include visual examination, moisture detection, air quality testing, surface sampling, and detailed reporting. Professional inspectors use specialized equipment like thermal imaging cameras, moisture meters, and air sampling devices to detect mold in walls, ceilings, crawl spaces, and HVAC systems. The entire inspection typically takes 2-4 hours, depending on property size and complexity. Understanding how this process works helps you prepare effectively and ensures you receive accurate results that protect your property investment.
Understanding the Mold Inspection Process
Mold poses serious health risks and structural damage to properties. Professional inspections reveal problems that homeowners often miss with the naked eye. When you schedule an inspection with Protect The Investment, you’re investing in comprehensive property protection.
Many property owners wonder what actually happens during a mold inspection. The process combines visual expertise, advanced technology, and laboratory analysis to provide definitive answers about mold presence and severity.
Step-by-Step Mold Inspection Procedure
Step 1: Initial Consultation and Property History (15-30 Minutes)
The inspector begins by interviewing you about your concerns. They ask specific questions about water damage history, visible mold spots, musty odors, and health symptoms experienced by occupants. This conversation helps inspectors focus on high-risk areas.
They review your property’s age, construction materials, previous repairs, and any moisture-related issues. This background information guides the inspection strategy and helps identify vulnerable areas.
Step 2: Comprehensive Visual Inspection (60-90 Minutes)
Inspectors systematically examine every accessible area of your property. They look for visible mold growth, water stains, discoloration, and conditions that promote mold development.
Common Areas Inspected:
- Bathrooms and kitchens (high-moisture zones)
- Basements and crawl spaces
- Attics and roof spaces
- HVAC systems and ductwork
- Behind appliances and fixtures
- Window frames and door seals
- Wall cavities and ceiling spaces
- Laundry rooms and utility areas
Inspectors document every finding with photographs and detailed notes. They pay special attention to areas with poor ventilation, water damage signs, or humidity issues.
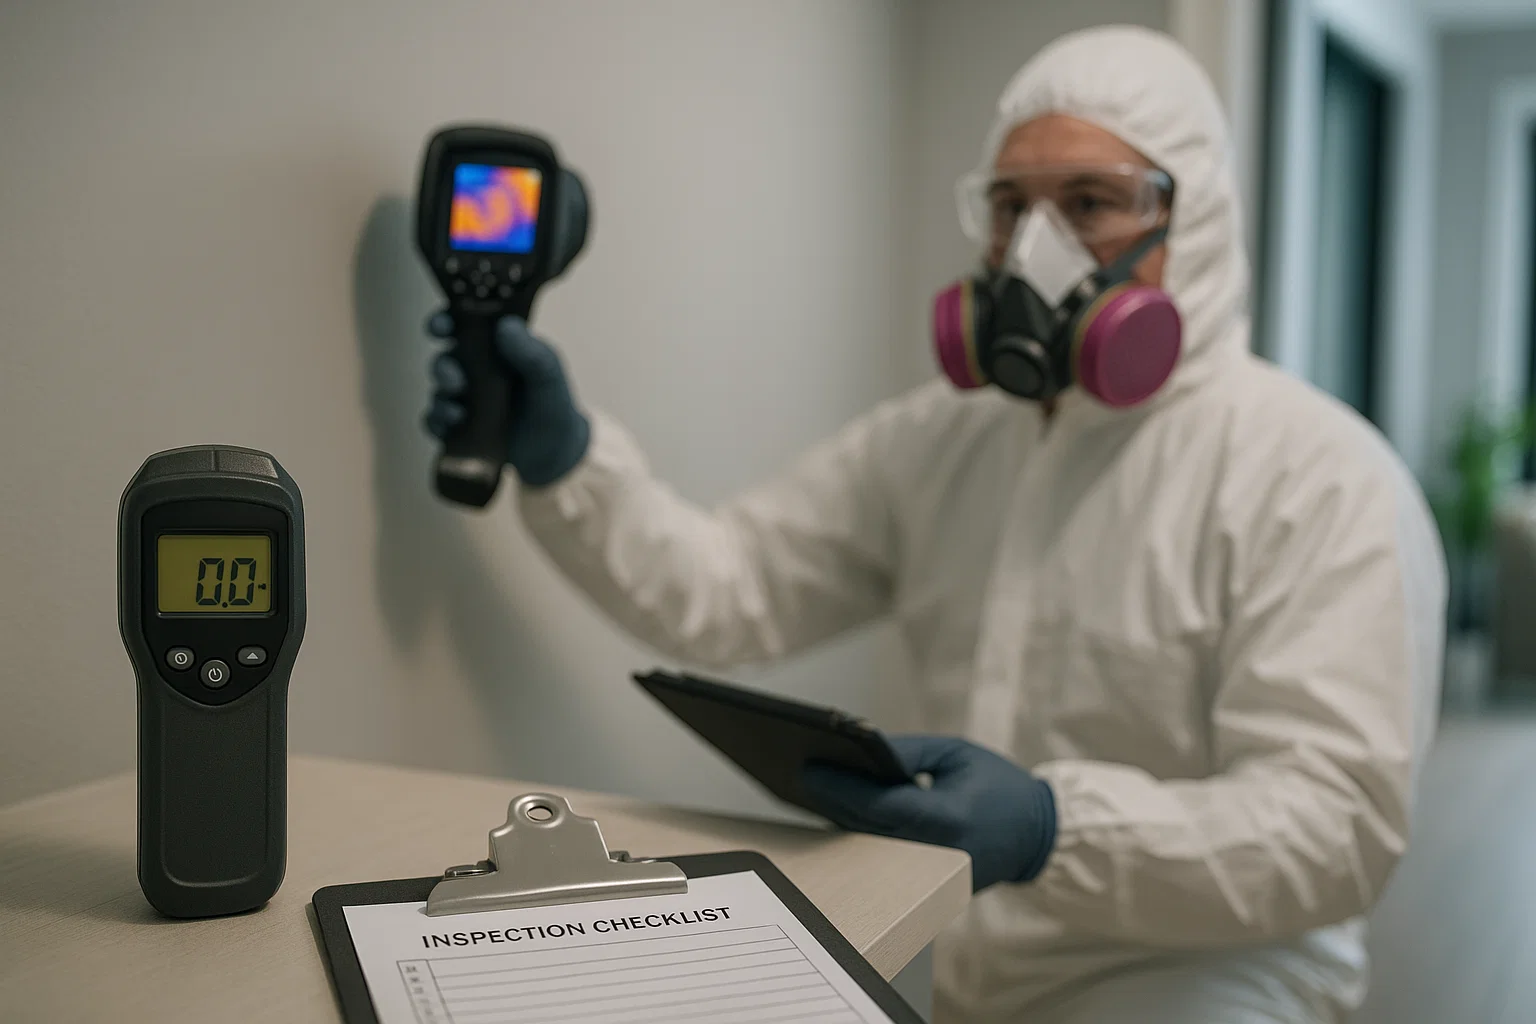
Step 3: Moisture Detection and Mapping (30-45 Minutes)
Moisture creates the perfect environment for mold growth. Inspectors use specialized equipment to detect hidden moisture that indicates potential mold problems:
Moisture Meters: These devices measure moisture levels in walls, floors, and ceilings without causing damage. Readings above 15% indicate conditions favorable for mold growth.
Thermal Imaging Cameras: Infrared technology reveals temperature variations that indicate moisture accumulation behind walls and under floors. Cold spots often signal water intrusion or inadequate insulation.
Hygrometers: These instruments measure relative humidity levels throughout your property. Humidity above 60% encourages mold development.
Inspectors create moisture maps showing problem areas that require further investigation or remediation.
Step 4: Air and Surface Sampling (30-60 Minutes)
Professional mold inspections include scientific testing to identify mold types and concentration levels.
Air Sampling: Inspectors collect air samples from multiple locations using specialized pumps and collection devices. They compare indoor air quality with outdoor baseline samples. This process identifies airborne mold spores invisible to the naked eye.
Surface Sampling: Inspectors take samples from suspected mold growth areas using three methods:
- Swab Sampling: Direct collection from visible mold or suspicious surfaces
- Tape Sampling: Clear tape pressed against surfaces to capture mold spores
- Bulk Sampling: Physical material samples sent to laboratories for analysis
Each sample receives proper labeling with location details and collection time for accurate laboratory analysis.
Step 5: Laboratory Analysis and Reporting (3-5 Business Days)
Samples go to certified laboratories where microbiologists identify mold species and determine spore concentrations. This scientific analysis distinguishes between harmless and toxic mold types.
Equipment Used During Professional Inspections
| Equipment | Purpose | What It Detects |
|---|---|---|
| Moisture Meters | Measure water content in materials | Hidden moisture in walls, floors, ceilings |
| Thermal Imaging Camera | Detect temperature variations | Water intrusion, insulation gaps, moisture patterns |
| Air Sampling Pumps | Collect airborne particles | Mold spore concentration in air |
| Borescope | Visual inspection of hidden areas | Mold inside walls, under floors, in ducts |
| Hygrometer | Measure humidity levels | Relative humidity percentages |
| Digital Camera | Document findings | Visual evidence of mold and damage |
| Protective Equipment | Safety for inspector | Prevents contamination during sampling |
What Inspectors Look For During Assessment
Professional inspectors search for specific indicators that reveal mold problems:
Visual Evidence:
- Discoloration on walls, ceilings, or floors
- Fuzzy or slimy growth patterns
- Peeling paint or wallpaper
- Warped or bulging surfaces
- Staining around windows or pipes
Environmental Conditions:
- High humidity levels (above 55%)
- Poor ventilation systems
- Water damage or leaks
- Condensation on windows or pipes
- Damp or musty odors
Structural Issues:
- Roof leaks or damage
- Plumbing failures
- Foundation cracks
- Inadequate drainage systems
- HVAC system problems
Types of Mold Testing Methods
Different situations require specific testing approaches:
Non-Invasive Testing
Inspectors examine visible areas without damaging property structures. This approach works well for routine inspections and visible mold growth.
Invasive Testing
When inspectors suspect hidden mold, they may need to access wall cavities, remove small sections of drywall, or inspect behind fixtures. Protect The Investment always obtains permission before conducting invasive testing.
Post-Remediation Testing
After mold removal, follow-up inspections verify successful remediation and confirm safe living conditions.
Understanding Your Inspection Report
Your detailed report includes:
- Executive Summary: Overview of findings and recommendations
- Detailed Observations: Room-by-room analysis with photographs
- Moisture Readings: Specific measurements from each tested area
- Laboratory Results: Mold species identification and concentration levels
- Risk Assessment: Health and structural impact evaluation
- Remediation Recommendations: Specific steps for mold removal
- Prevention Strategies: Long-term solutions to prevent recurrence
Cost Factors for Mold Inspections
| Factor | Impact on Cost | Typical Range |
|---|---|---|
| Property Size | Larger properties require more time | Small: $300-$500, Large: $700-$1,200 |
| Testing Scope | More samples increase laboratory fees | Basic: $300-$600, Comprehensive: $800-$1,500 |
| Property Accessibility | Hard-to-reach areas need specialized equipment | Standard: $400-$700, Complex: $900-$1,600 |
| Geographic Location | Urban areas typically cost more | Varies by region |
| Inspector Certification | Highly certified professionals charge premium rates | +$100-$300 for specialists |
Pro Tip: The Pre-Inspection Preparation Strategy
Pro Tip: Before your scheduled mold inspection, create a detailed list of every area where you’ve noticed musty odors, water stains, or potential moisture issues—even if you don’t see visible mold. Take photos with your smartphone and note when you first observed each problem. Share this documentation with your inspector at Protect The Investment before they arrive. This preparation ensures inspectors focus on your specific concerns while conducting their comprehensive assessment, potentially saving you time and money by targeting high-risk areas immediately. Clients who provide this pre-inspection information receive more thorough evaluations of problem areas.
When You Should Schedule a Mold Inspection
Certain situations demand professional inspection:
- After Water Damage: Floods, leaks, or burst pipes create mold within 24-48 hours
- Before Property Purchase: Pre-purchase inspections reveal hidden problems
- Visible Mold Growth: Any visible mold requires professional assessment
- Persistent Musty Odors: Smells indicate hidden mold problems
- Health Symptoms: Unexplained respiratory issues, allergies, or headaches
- After Major Renovations: Construction can disturb hidden mold colonies
- HVAC Concerns: Contaminated systems spread mold throughout properties
- Regular Maintenance: Annual inspections catch problems early
Preparing for Your Mold Inspection
Make your inspection more effective with these preparation steps:
- Clear Access: Remove obstacles blocking walls, attics, and crawl spaces
- Document Concerns: List all areas with moisture or odor issues
- Provide History: Gather records of past water damage or repairs
- Ensure Availability: Be present to answer inspector questions
- Secure Pets: Keep animals in safe areas during inspection
- Turn Off Air Systems: HVAC systems should be off during air sampling
Final Thoughts
Understanding how a mold inspection is done empowers you to protect your property investment effectively. The systematic process combines visual expertise, advanced technology, and scientific analysis to provide comprehensive assessment of mold problems.
At Protect The Investment, we conduct thorough inspections that identify visible and hidden mold, assess health risks, and provide actionable remediation recommendations. Our certified inspectors use state-of-the-art equipment and follow industry best practices to ensure accurate results.
Don’t wait until mold problems escalate. Schedule your professional mold inspection today and gain peace of mind knowing your property receives expert evaluation and protection.
Frequently Asked Questions
How long does a mold inspection take?
A typical residential mold inspection takes 2-4 hours, depending on property size and complexity. Larger properties or those with extensive suspected areas may require 5-6 hours. Laboratory analysis adds 3-5 business days to receive final results.
Can I do a mold inspection myself?
While DIY test kits exist, they lack the accuracy and comprehensiveness of professional inspections. Protect The Investment uses certified equipment and trained inspectors who identify problems homeowners typically miss. Professional inspections also provide legally valid documentation for insurance claims or real estate transactions.
Do inspectors remove mold during inspection?
No. Mold inspections identify and assess problems but don’t include removal services. This separation ensures unbiased evaluation. After receiving your inspection report, you can hire qualified remediation specialists to address identified issues.
What’s the difference between mold inspection and mold testing?
Mold inspection is the comprehensive visual examination of your property, while mold testing specifically refers to collecting and analyzing samples. Complete professional assessments include both inspection and testing for accurate results.
Will inspection damage my property?
Standard inspections are non-invasive and cause no damage. If inspectors need to access hidden areas, they request permission first and minimize any necessary openings. Protect The Investment prioritizes property preservation during all assessments.